
postman 다운로드
Postman API Platform | Sign Up for Free
Postman is an API platform for building and using APIs. Postman simplifies each step of the API lifecycle and streamlines collaboration so you can create better APIs—faster.
www.postman.com
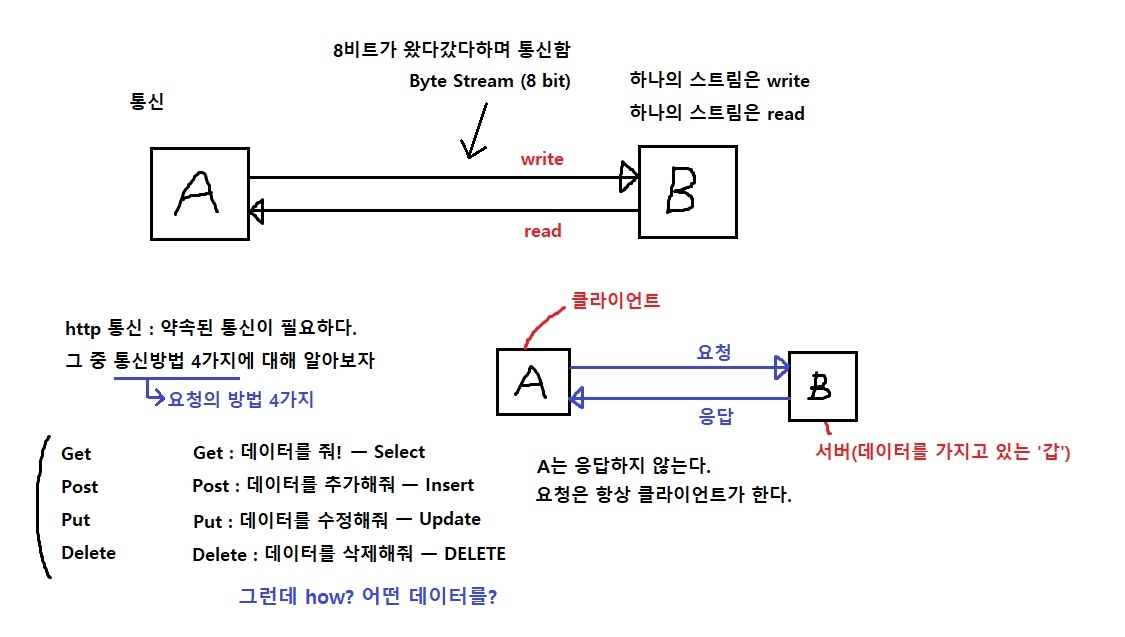
http 요청방식

http 요청 실습1
우선 8080포트 중복에러가 떴는데 실행 중인 포트에 안 잡혀서
9090포트로 바꿔서 접속하기로 했다.
application.yml

그리고 com.cos.blog.test 패키지에 HttpControllerTest 클래스를 생성한다.

HttpControllerTest.java
package com.cos.blog.test;

import org.springframework.web.bind.annotation.DeleteMapping;
import org.springframework.web.bind.annotation.GetMapping;
import org.springframework.web.bind.annotation.PostMapping;
import org.springframework.web.bind.annotation.PutMapping;
import org.springframework.web.bind.annotation.RestController;

// @Controller : 사용자가 요청하면 HTML 파일을 응답해준다.
// @RestController : 사용자가 요청하면 Data를 응답해준다.
@RestController
public class HttpControllerTest {

	//  http://localhost:9090/http/get
	@GetMapping("/http/get")
	public String getTest() { // select
		return "get 요청";
	}

	//  http://localhost:9090/http/post
	@PostMapping("/http/post")
	public String postTest() { // insert
		return "post 요청";
	}

	//  http://localhost:9090/http/put
	@PutMapping("/http/put")
	public String putTest() { // update
		return "put 요청";
	}

	//  http://localhost:9090/http/delete
	@DeleteMapping("/http/delete")
	public String deleteTest() { // delete
		return "delete 요청";
	}
}
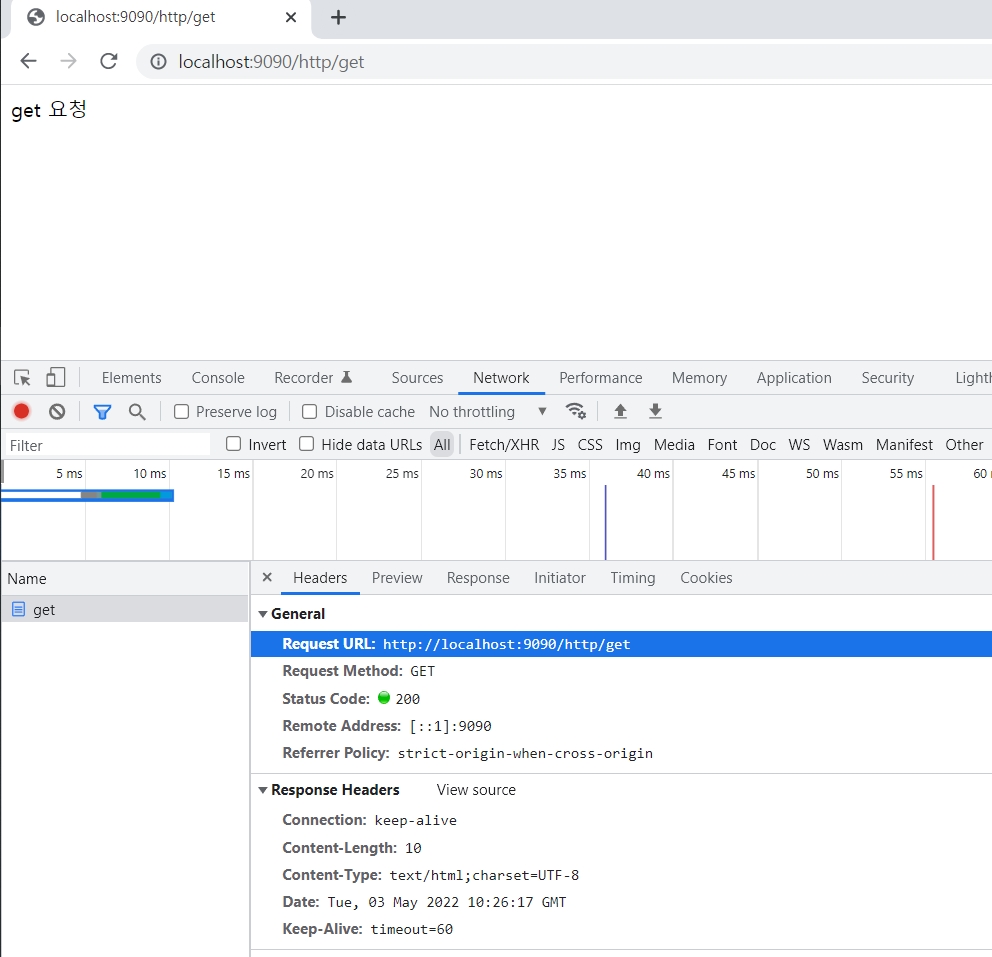
get 요청은 깔끔하게 성공하였다.
하지만 post 요청을 하게 되면,

이와 같이 오류가 발생한다.
하지만 오류가 발생하는 것이 당연하다.
인터넷 브라우저 요청은 무조건 get요청밖에 할 수 없기 때문이다.
post, put, delete는 불가능하다.
따라서 앞서 설치했던 postman에서 요청해보도록 하자.

성공적으로 되는 것을 확인할 수 있다.
http 요청 실습2
http 실습을 더 진행하기 위해 Member.java를 작성한다.


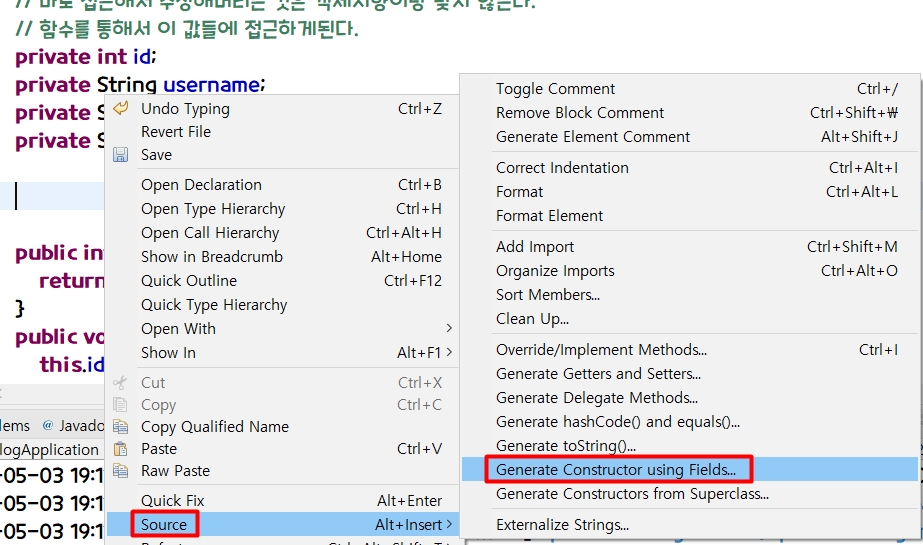
이후 super();는 지워준다.
Member.java
package com.cos.blog.test;

public class Member {
	// 여기다 private를 사용하는 이유는 바로 직접적으로 접근하는 것을 막기 위함이다.
	// 바로 접근해서 수정해버리는 것은 객체지향이랑 맞지 않는다.
	// 함수를 통해서 이 값들에 접근하게된다.
	private int id;
	private String username;
	private String password;
	private String email;

	public Member(int id, String username, String password, String email) {
		this.id = id;
		this.username = username;
		this.password = password;
		this.email = email;
	}

	public int getId() {
		return id;
	}
	public void setId(int id) {
		this.id = id;
	}
	public String getUsername() {
		return username;
	}
	public void setUsername(String username) {
		this.username = username;
	}
	public String getPassword() {
		return password;
	}
	public void setPassword(String password) {
		this.password = password;
	}
	public String getEmail() {
		return email;
	}
	public void setEmail(String email) {
		this.email = email;
	}
}
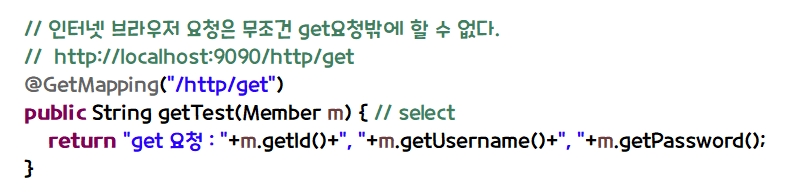
get 요청
HttpControllerTest.java 에서 get 요청 코드를 다음과 같이 수정하고

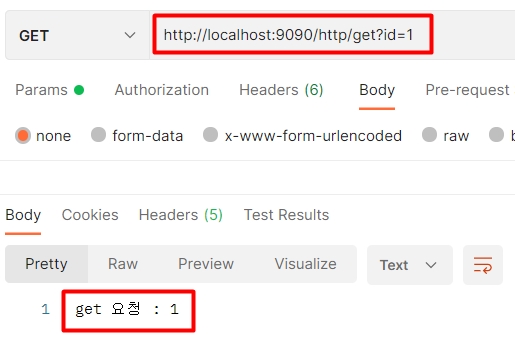
쿼리스트링 id=1을 보내게 되면 다음과 같이 출력된다.
HttpControllerTest.java


성공적으로 출력된다.
get요청시에는 ?뒤의 쿼리스트링을 통해 이렇게 데이터를 보낼 수 있다.
그렇다면 한꺼번에 보내고 받을 수는 없을까?


post 요청


text이므로 일반 문자열이다.


JSON이다. @RequestBody Member m 에서 자동으로 파싱해서 오브젝트에 넣어주게 된다.
@RequestBody라는 어노테이션을 통해서 매핑해서 받는 것이다.
이 일을 스프링부트의 MessageConverter가 하게 된다.
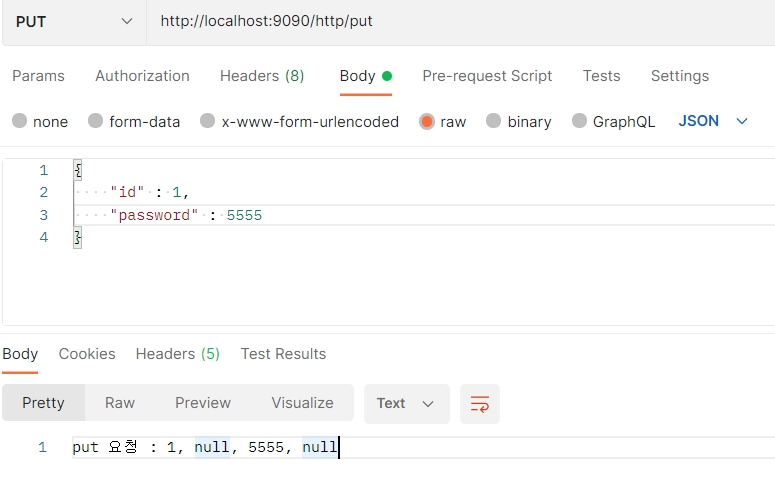
put 요청

참고자료 : https://youtu.be/6lSMCAq-fYg
'자바 스프링 > 부트 블로그 JPA 프로젝트' 카테고리의 다른 글
| #8 스프링 부트의 yml과 jsp파일 리턴 (0) | 2022.05.04 |
|---|---|
| #7 lombok 설치와 사용 (0) | 2022.05.04 |
| #5 Git 연동하기 (0) | 2022.05.02 |
| #4 MySQL 환경세팅과 스프링 연결하기 (0) | 2022.04.30 |
| #3 스프링부트 간단한 실행 확인 (0) | 2022.04.30 |